Recent Posts

Guide to Decontaminating Lab Equipment: From Cleaning to Sterilization
When to Repair vs. When to Replace Lab Equipment: A Cost-Benefit Analysis
Key Factors That Influence Lab Equipment Depreciation
Fume Hood Certification Requirements Every Lab Must Meet
Lab Equipment Repair Secrets Technicians Don’t Usually Share
Microbiology Labs: Affordable Used Equipment Buying Tips
Leave a comment
Guide to Decontaminating Lab Equipment: From Cleaning to Sterilization

Summary
● Begin by cleaning equipment with mild detergent and water to remove dirt and residues.
● Always wear PPE such as gloves, goggles, and lab coats.
● Rinse with distilled water and let items air-dry completely.
● Use autoclaving for heat-resistant materials like metal and glass.
● Apply chemical disinfectants (e.g., 70% isopropyl alcohol, bleach, or hydrogen peroxide) for sensitive surfaces.
● Ensure proper contact time for all disinfectants to work effectively.
● Never skip cleaning before sterilizing, it reduces sterilization effectiveness.
● Label, package, and store sterilized equipment in a clean, sealed environment.
● Keep a record of each decontamination cycle for traceability and compliance.
● Regularly inspect and maintain sterilization equipment for efficiency.
● Follow CDC, NSF, and laboratory-specific protocols to stay compliant.
Introduction
Maintaining a sterile environment is critical to personnel safety and scientific success. At R&D Laboratory Equipment, we understand that lab equipment decontamination is not just a safety protocol; it is necessary for the proper functioning of your laboratory, as it affects accuracy, equipment lifespan, and the safety of your personnel.
Decontamination involves a series of steps, from the initial cleaning and chemical treatment to sterilization techniques, all of which are important in ensuring the safety, accuracy, and compliance in laboratories.
This guide addresses all aspects and details of equipment decontamination, covering common errors, best practices, and a step-by-step decontamination process suitable for your establishment.
Initial Cleaning Lab Equipment: Removing Visible Contaminants Effectively
The first and most crucial step in a laboratory equipment decontamination process is the initial cleaning. This stage focuses on removing visible residues, organic materials, and surface debris before any chemical or sterilization treatment is applied. Without proper cleaning, sterilization processes such as autoclaving and vaporized hydrogen peroxide will be less effective.
Steps for an Effective Initial Cleaning
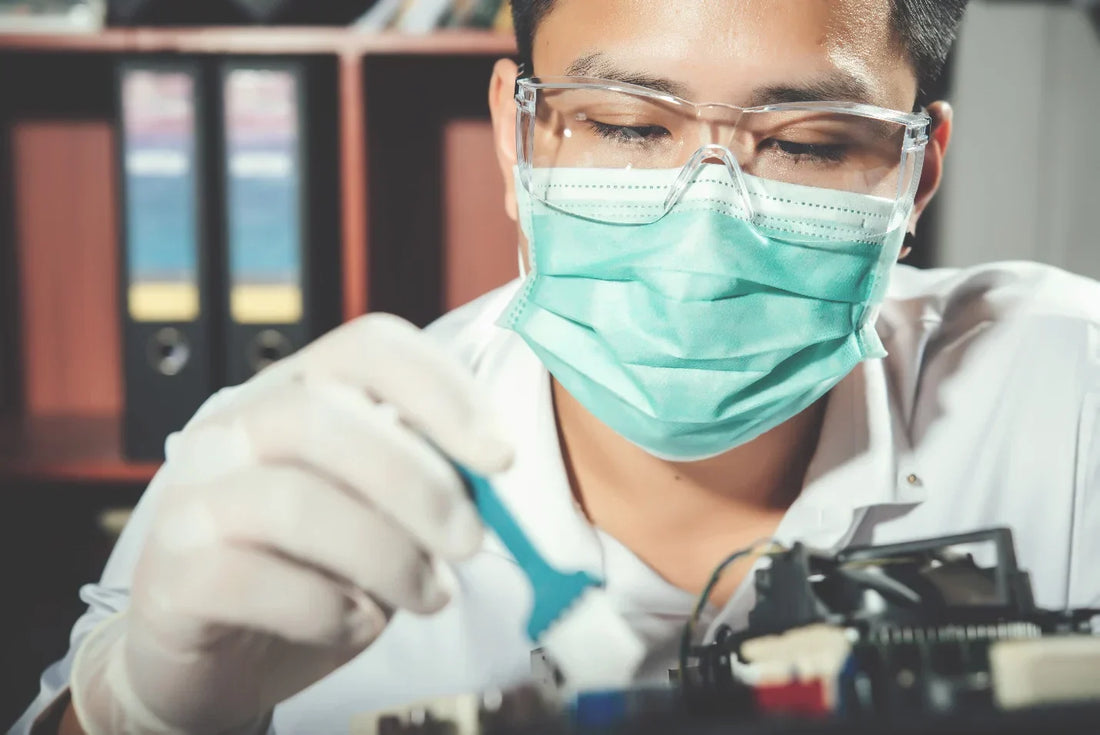
● Preparation: Disconnect or de-energize any electrical equipment before cleaning. And always wear your personal protective equipment (PPE), such as gloves, goggles, and lab coats.
● Manual cleaning: Use lint-free wipes, soft brushes, or non-abrasive sponges to remove dirt or residue. For tough stains, rinse the equipment to soften before washing with a recommended detergent.
● Rinsing and drying: Rinse the equipment thoroughly with distilled water to remove detergent residues. And dry in a clean, dust-free environment or drying cabinet to avoid recontamination.
Choosing the Right Bio Decontamination Equipment for Your Laboratory
There exist different biological decontamination systems, and not all of them are compatible with your lab or equipment. Choosing the right system ensures complete microbial inactivation, supports biosafety standards, and protects both personnel and research integrity.
Here are some factors to consider when choosing a bio decontamination system:
● The biosafety level of your laboratory determines the degree of containment and safety measures required for handling biological materials.
● Types of contaminants handled: Different contaminants require different decontamination strategies. For instance, biological contaminants can be treated with autoclaving and UV-C irradiation, methods that are not compatible with chemical or particulate contaminants.
● Equipment compatibility with decontaminants: Not all decontaminants are suitable for every surface material. Using the wrong agent can lead to equipment failure and data contamination.
● Compliance requirements: Your decontamination strategy must comply with regulatory and safety standards formulated by the CDC, ISO, NSF, and GMP.
Step-by-Step Process of Lab Equipment Decontamination
A well-structured decontamination process is essential for ensuring the proper functioning of your equipment, the safety of personnel, and scientific success.
Here is a step-by-step decontamination process:
● Cleaning
This stage focuses on initially removing dirt, residues, and biological materials from the equipment. It uses neutral-pH laboratory detergents to dissolve stains. The process basically involves scrubbing with recommended detergents and washers, and rinsing thoroughly to ensure all residues are removed.
● Chemical Decontamination
After cleaning, apply the appropriate chemical disinfectant to neutralize microorganisms. Common disinfectants include 70% isopropyl alcohol, sodium hypochlorite, or hydrogen peroxide. It is important to have the right solution to prevent corrosion or equipment damage. Also, ensure proper contact time, as recommended by the manufacturer.
● Sterilization
Sterilization provides complete microbial destruction, including bacteria, spores, and viruses. There are various methods of sterilization, including autoclaving, dry heat, gas, plasma sterilization, and UV-C light exposure.
Autoclaving is an ideal option for glassware, stainless steel, and other heat-resistant materials. Dry heat is also suitable for materials that can’t be exposed to moisture, such as glass and metal components. Gas sterilization is ideal for heat or moisture-sensitive materials. And UV-C light is perfect for small, exposed surfaces.
● Rinsing and Neutralization
After chemical or vapor decontamination, rinse the equipment in sterile deionized water to remove residue. For sensitive materials, use alcohol rinses followed by controlled drying. Also neutralize chemical agents such as chlorine or peracetic acid to prevent reactivity.
● Validation and Documentation
Once lab equipment decontamination and sterilization are complete, ensure compliance with NSF/ANSI 49, ISO 14644, and GMP validation standards. Also record the date, method, equipment used, personnel involved, and results in the decontamination log.
Advanced Methods of Lab Equipment Sterilization for Maximum Safety

Advanced lab sterilization methods to maximize personnel safety include:
● Vaporized Hydrogen Peroxide (VHP) Decontamination
This method releases hydrogen peroxide vapor into the chamber, which breaks down into water and oxygen after sterilization. It is a widely used method for sterilizing biosafety cabinets, incubators, and cleanrooms in BSL-2 and BSL-3 labs.
● Ultraviolet (UV-C) Light Decontamination
UV-C radiation (at 254 nm) can be used to destroy microbial DNA and RNA, preventing replication. It’s a fast, chemical-free option for surface-level contamination. It is best for biosafety cabinets, benchtops, and tools in BSL-1 and BSL-2 environments.
● Formaldehyde Gas Decontamination
Formaldehyde is an effective sterilant that penetrates deep into equipment surfaces, offering a broad microbial kill spectrum, including spores. However, this gas can be toxic and carcinogenic. It requires careful ventilation and neutralization.
Comparing Cleaning vs. Sterilization: What Your Lab Should Know
Cleaning physically removes dirt and residue in your equipment, while sterilization kills all microorganisms, including spores. For any lab procedure, cleaning is a crucial first step before you can proceed to sterilization.
While cleaning is done with mild detergents, soft brushes, and deionized water for rinsing, sterilization is a more advanced form of decontamination. It employs methods like heat, radiation, or chemicals.
Best Practices to Maintain Sterilized and Contamination-Free Lab Equipment
Below are key best practices that every lab must follow to maintain a sterilized and contamination-free lab environment:
● Handle sterilized equipment with proper aseptic technique. For instance, always use sterile gloves, tongs, or forceps to handle sterilized equipment.
● Store equipment in a controlled environment, such as sealed sterile packaging or autoclave-safe pouches. Also, keep sterilized materials in clean, dry storage cabinets.
● Establish a regular cleaning and monitoring schedule. Routine maintenance is essential to maintain sterility between circles.
● Train personnel on biosafety procedures, aseptic handling, and contamination response. Conduct routine audits to ensure compliance with internal SOPs and regulatory standards.
Common Errors to Avoid During Lab Equipment Sterilization and Decontamination
Most errors that occur during lab equipment decontamination are due to rushed procedures, a lack of validation, or the use of the wrong methods. Here are some common pitfalls:
● Skipping cleaning before sterilization: Dirt, proteins, and chemical residues can shield microorganisms from heat or sterilants, resulting in incomplete decontamination.
● Overloading autoclaves or sterilization chambers: Overloading too much equipment in a decontamination equipment restricts steam or gas penetration, leading to uneven sterilization and cold spots.
● Using the wrong sterilization method: Some materials, such as plastics, electronics, or optimal instruments, are heat or moisture-sensitive and can warp, melt, or degrade under steam autoclaving.
Recommended Tools and Products for Cleaning and Sterilizing Lab Equipment
Using the right cleaning materials is crucial to maintaining equipment performance, extending service life, and ensuring regulatory compliance. Below are the most reliable tools and products for cleaning lab equipment:
● Ultrasonic lab equipment cleaner: Used for physically dislodging contaminants from hard-to-reach areas.
● Non-abrasive brushes and swabs: Use soft-bristled nylon or foam-tipped applicators to remove residue from tight spaces.
● Neutral pH detergents: Laboratory-grade detergents such as Alconox and Decon90 remove organic and inorganic residues without causing corrosion.
● 70% isopropyl alcohol: Effective for quick disinfection of surfaces between experiments.
● Autoclaves: Autoclaves use pressurized steam to kill bacteria, spores, and viruses on heat-resistant instruments.
● UV Sterilization Lamps: Common in biosafety cabinets and cleanrooms, UV lamps provide non-contact disinfection for surfaces and air.
● Ethylene Oxide (EtO): Effective for complex or heat-sensitive instruments, though it requires careful handling and aeration.
Conclusion
A well-structured lab equipment decontamination procedure is essential for maintaining a safe, compliant, and effective laboratory environment. Following a defined decontamination procedure not only safeguards personnel but also extends the lifespan of sensitive lab tools and supports consistent, reproducible results.
By combining effective cleaning techniques, advanced sterilization methods, and regular monitoring, laboratories can meet strict CDC, ISO, NSF, and GMP standards. At R&D Laboratory Equipment, we provide certified tools and systems that support lab processes and prevent contamination.
FAQs
1. What is the difference between cleaning lab equipment and sterilizing it?
Cleaning removes visible dirt, residue, and organic matter using water, detergents, or ultrasonic methods. Sterilization eliminates all forms of microbial life, including bacteria, spores, and viruses, using high heat, chemicals, or radiation.
2. Which bio-decontamination equipment is most effective for laboratories?
The most effective bio-decontamination equipment depends on your lab’s biosafety level and the type of contaminants handled. Common options include hydrogen peroxide vapor (HPV) systems, ultraviolet (UV-C) light units, and formaldehyde gas systems.
3. How often should lab equipment sterilization be performed?
Sterilization frequency depends on equipment usage, contamination risk, and lab type. For example, tools used in microbiology or clinical testing should be sterilized after every use. At the same time, biosafety cabinets or fume hoods may follow scheduled decontamination cycles (weekly, monthly, or as required by internal protocols and regulatory standards).
4. Can improper cleaning impact research results?
Yes. Residual contaminants, biofilms, or chemical residues can interfere with reactions, distort measurements, and compromise experiment reproducibility.
5. Are there eco-friendly options for lab equipment decontamination?
Yes. Many modern decontamination systems use low-toxicity, biodegradable cleaning agents and non-chlorinated disinfectants. Technologies such as vaporized hydrogen peroxide and ozone-based systems are eco-friendly alternatives.
6. How do you decontaminate lab equipment?
Decontaminate lab equipment by first cleaning off visible debris, then applying a disinfectant or sterilization method such as autoclaving, UV exposure, or chemical treatment.
7. What are the steps for decontaminating implements?
The basic steps are cleaning, disinfection, sterilization, and validation. Each step ensures contaminants are removed, microbes are killed, and the process meets safety standards.
8. What are the CDC guidelines for cleaning and decontamination of instruments?
The CDC recommends cleaning instruments immediately after use, using compatible disinfectants, and following sterilization cycles that match equipment type and biosafety level.
9. How do you clean instruments before sterilization?
Use neutral-pH detergent or enzymatic cleaners, rinse thoroughly with distilled water, and ensure items are completely dry before sterilizing. Ultrasonic cleaning is highly effective for precision tools.
10. What are the four methods of decontamination?
The primary methods are physical (heat or radiation), chemical (disinfectants), mechanical (filtration or washing), and biological (enzyme-based cleaners).